


Two Polar Express Scrapbook Page Layouts
Is there a more enchanted time of the year than Christmas?! Scrapbooking guru, Christine Meyer, shows us how to create two simple and enchanted scrapbook layouts using products from The Polar Express Collection. These layouts will also work great with any of our scrapbook paper and scrapbook stickers.


Family photos provided courtesy of Canva.
Instructions and supplies are provided below as well as in this video tutorial.
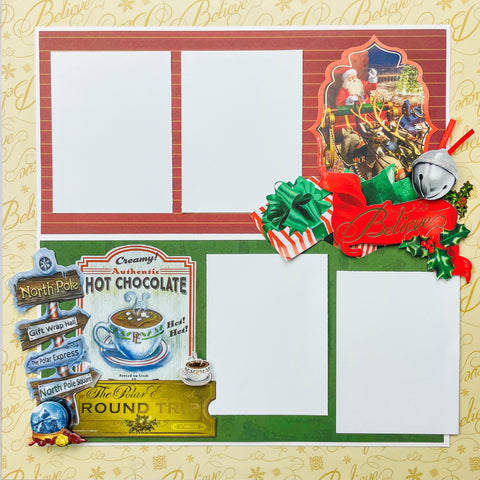
Polar Express “Believe” Layout
- White cardstock
- Paper Trimmer
- Adhesive - Runner & Foam
- Die Cuts, such as The Polar Express Die Cuts
- 3D Stickers, such as The Polar Express 3D Stickers
- Scrapbook paper, such as The Polar Express North Pole Tags Paper
- Scrapbook paper, such as The Polar Express All Aboard Tags Paper
- Scrapbook paper, such as The Polar Express Believe Paper
- Trim a 10” X 5.5” piece from both of the tags papers. You’ll be using the B side of those papers.
- Attach those horizontally to white cardstock leaving a ¼” margin between them and all the way around. Trim the excess so that you have approximately a ¼” white margin all the way around.
- Center the square onto the B side of the “Believe” paper.
- Use the North Pole, Hot Chocolate, and Round Trip Ticket Die Cuts in the bottom left corner.
- Use the Santa and Presents Die Cuts in the top right corner
- Add the Believe Die Cut overlapping the presents but pop it up with foam adhesive so it will stand out as the title more.
- Cut four 3”X4” white cardstock pieces.
- Place two to the left of the Santa cluster on the top part of the layout
- Stagger the other two next to the Hot Chocolate. You will need one in this row to go a little beyond the border of your green patterned paper.
- Add small embellishments from the foil stickers and 3D stickers to each cluster.
Polar Express “North Pole” Layout

Supplies Needed for "North Pole" Layout
- White Cardstock
- Adhesive - Runner & Foam
- Scrapbook paper, such as The Polar Express All Aboard Tags Paper
- Die Cuts, such as The Polar Express Die Cuts
- 3D Stickers, such as The Polar Express 3D Stickers
- Foil stickers, such as Foil Stickers The Polar Express
- More stickers, such as The Polar Express Sticker Pack
Instructions
- Cut the border strips off from the “North Pole Tags” paper.
- Go about two inches up and add the ticket border. Make sure to leave the bottom as adhesive-free as possible as we will pull it up to create some dimension.
- Next add the Bell border followed by one of the red ribbon borders, followed by the snowflake border, filled by the believe border, and finally the second ribbon border.
- Use your fingers to pull up the bottom edge of each border. This will give the look of ruffles!
- Use the other side of the tag paper to cut two 3”X4” papers and one 6”X4” paper. I alternated the stripes for mine but if you just want to use one big piece that will work as well!
- Cut a 7 ¼” X 5 ¼” piece of white cardstock for your photo mat.
- Add the 3D Polar Express sticker to the upper right-hand corner of the photo mat. Add the Ticket die-cut overlapping underneath it and to the left of it.
- For the bottom right cluster add the Bell die cut to the right of the photo, tucking just a little bit of it under the photo mat. Then pop up the Train die cut with foam adhesive and add it to the bottom right corner of the photo.
- Add foam adhesive to the North Pole die cut and add that to the lefthand bottom side of the photo.
- For small embellishments add the epoxy dots and silver foil snowflakes to the top cluster. Add the “First Gift” sticker from the 3D sticker sheet and some gold snowflakes from the sticker pack to the right-hand side cluster. Finally, add the small 3D presents and Polar Express badge to the left-hand side cluster.