


Removable Sticky Note Dashboard with Xyron

Hello Everyone! Like most people who have planners, I love sticky notes! To be honest, I have always loved sticky notes and have used them in my planners for years. However, until recently, I had never heard of a sticky note dashboard (crazy, I know). Since my planner has a spine that can’t be opened, adding a ‘’pre-made’’ sticky dashboard is sort-of out of the question. So, I decided to make my own and that is what I will be showing you today! Today, I am going to show you how to make a Removable Sticky Note Dashboard using Xyron! If you are unfamiliar with Xyron they are a company that creates products to enhance and protect your handmade creations. Some of the products that they are best known for are their sticker makers, creative stations, and tape runners. In today’s project, I will be using their tape runner. This particular sticky note dashboard that I am creating, was designed to go into my Paper House Productions 18-Month Stargazer Planner. Like every Paper House planner, the 18-Month Stargazer Planner is beautifully put together and includes a variety of things. For example, quotes, pockets, several different places to take notes, stickers, etc. Also, if are not a fan of the ''galaxy look'', Paper House has a bunch of planner options ranging from florals to Wonder Women!
To create your own Removable Sticky Note Dashboard, you would do the following:
Step 1: Cut a piece of scrapbooking paper that fits on the inside of your planner. If you are using the 18-Month Stargazer Planner you will want to cut a piece of paper that is 6 ½ inches wide by 9 inches tall. The paper I used for my planner came from the Color Washed 12’’ Paper Pad.
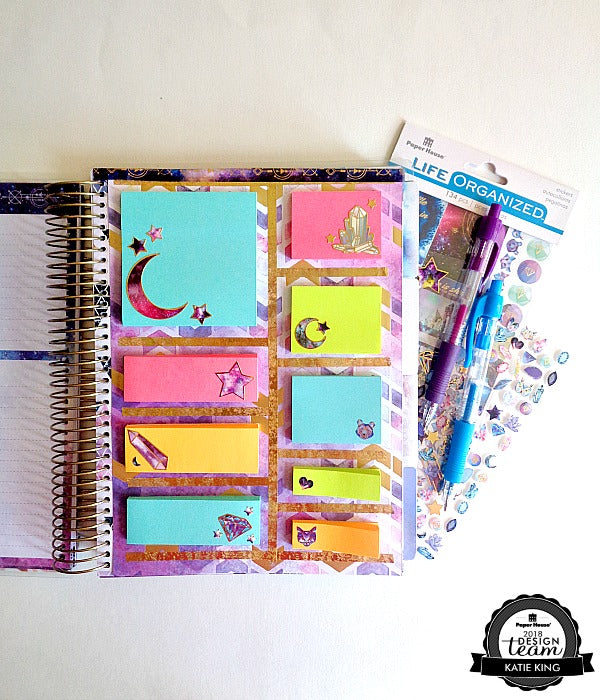
Step 2: Grab all of your sticky note pads and lay them out onto your piece of scrapbooking paper. Once you are happy with the layout, flip each sticky note pad over and apply some adhesive to the back using your Xyron Tape Runner. Then press your sticky note pads into place. Note: If you are wanting to use a big sticky note pad (like the blue pad in the corner) you will want to remove half of the sticky notes from the pad, so the sticky note dashboard doesn’t add more bulk to your planner.

Step 3: Lay your sticky note dashboard onto a planner page that you don’t mind covering up. Then grab a piece of washi tape (I’m using the wide tape from the Stargazer Washi Tape Set) and apply half of it the top of the sticky note dashboard, then fold over the half of the washi tape onto your planner page. To further decorate your sticky note dashboard, you can apply more washi tape around your sticky notes. For my sticky note dashboard, I used the thin gold tape from the Wine Washi Tape Set to outline my sticky notes. Once you are happy with how your sticky note dashboard looks, you are ready to start using it!
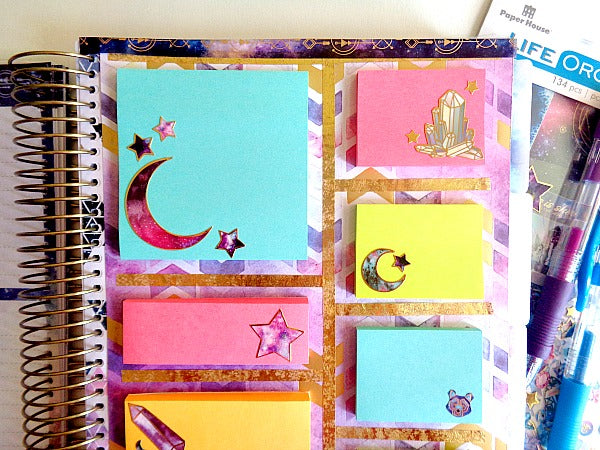
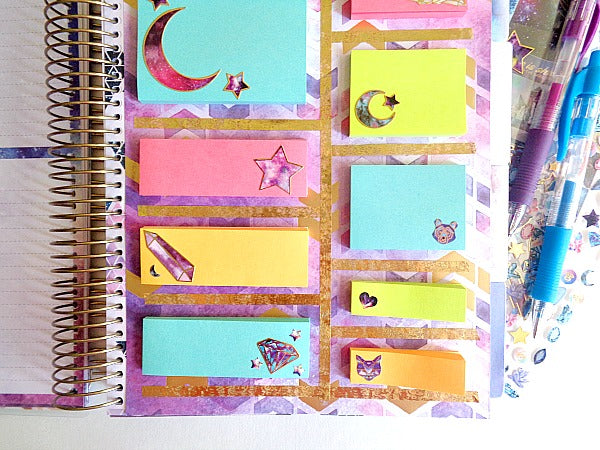
I love how this removable sticky note dashboard turned out! Using the Xyron Tape Runner really made the whole process go by very quickly. In terms of time, I had this dashboard created within 30 minutes. It probably should have taken me less time than that, but I kept changing the layout of my sticky notes! Speaking of sticky notes, you may have noticed that I decorated my sticky notes. To do this I used the Stargazer Faux Enamel Sticker and Stargazer Life Organized Micro Stickers, which match back to the 18-Month Stargazer Planner. This is totally optional, but I thought it made the sticky notes look a little cuter.
Removable Sticky Note Dashbaord Supply List:
Color Washed 12″ Paper Pad
,
Xyron Tape Runner
,
Â
Stargazer Washi Tape Set
,
Wine Washi Tape Set
,
Stargazer Faux Enamel Sticker
, Thank you so much for stopping by today and for taking the time to read my project post for Paper House Productions! To follow along with all the fun stuff at Paper House Productions, don’t forget to like them on
and to follow their
Pinterest page
for more project inspiration. Happy Crafting! Katie