Making a Shaker Card, Birthday Card, and Gift Tag
Hello everyone. It's Kinjal here again from MindMyPaper! I am glad you’ve found your way here, and today I am sharing 3 projects using the Mommy Lhey card kit. It’s a very fun kit that can be used for making simple cards on the go, or even to make cards with your friends and family.
To inspire some creative juices, here are 3 projects:
Project 1: Mommy Lhey Shaker Card Instructions
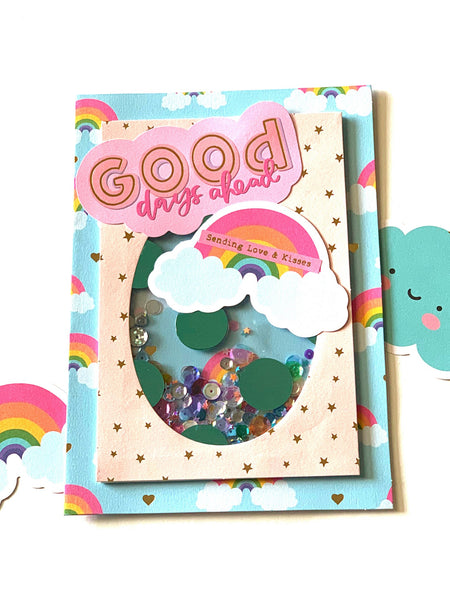
This card is a fun shaker card. Extra items you will need are:
- An acetate sheet
- Shaker sequins, of your choice
- Double sided foam tape
Step 1:
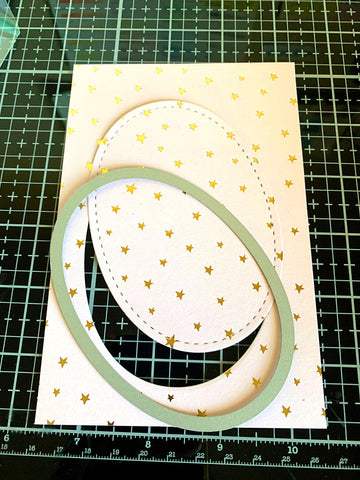
I used an oval die to die cut the shape from this star background cardstock from the kit. If you don’t have a die, fret not. You can just draw a circle or oval and cut it out from the middle.
Step 2:
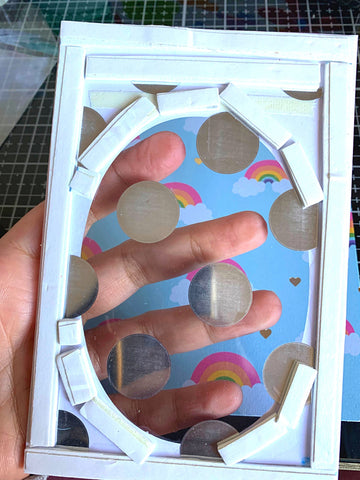
Take an acetate sheet that will cover the entire shape and glue it to the back side of the shape. Using double sided foam tape, cover the entire backside of the acetate so that it can contain all the shaker bits within the shape, as seen in the picture.
Step 3:
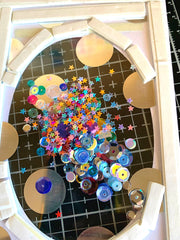
I took a rainbow folded note card that is already included in this kit, as the base. I added some stars and sequins in the middle and adhered the acetate front that we made, making sure that none of the shaker bits are in the way of the glue. Press down firmly, so that none of them fall out while shaking.

Step 4:
Now it’s time for adding the sentiments. I wanted to make an encouraging card for a friend, so I chose these 2 precut images and simply glued them onto the card. I also added that little sticker that says Sending Love & Kisses over the rainbow.
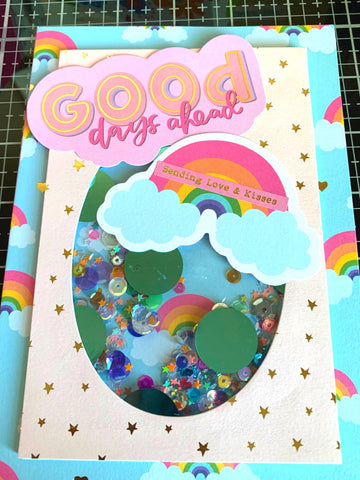
Products used to make shaker card:
Project 2: Mommy Lhey Gift Tag
In the previous shaker card, I had made an oval die cut, so I decided to use it to make a cute gift tag to go along with the card.

Step 1:
To add some more strength to the oval piece, I die cut another oval from white cardstock and adhered it to the back, and then used a punch hole.
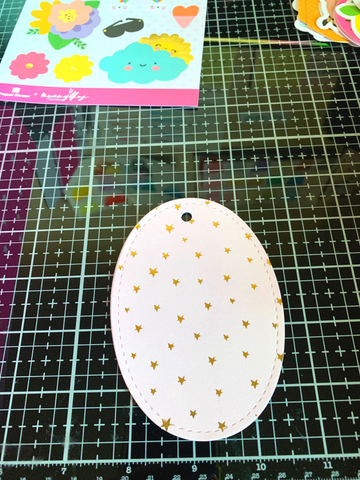
Step 2:
I chose the precut pieces included in the kit to make a layout.
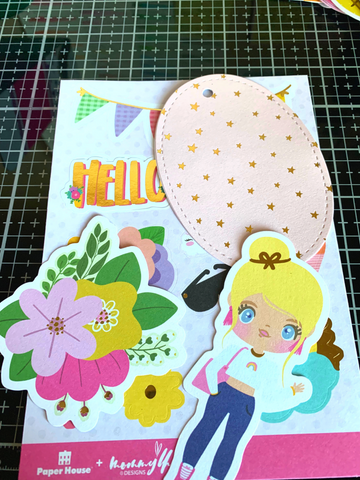
Step 3:
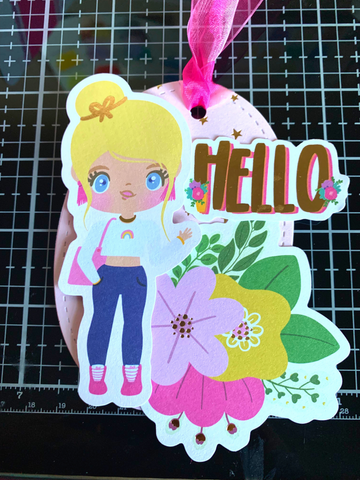
The Hello sentiment is a sticker, but since it was going to hang out of the oval area, I decided to stick it to a white cardstock and then cut around it. This way, the sticker can be used as a sentiment as well as not worry about it sticking anywhere.
Products used for Mommey Lhey Gift Tag:
Project 3: Mommy Lhey Birthday Card
This card uses the fun and cute clear stamp that is included in this kit.

Additional items required to make this card:
- A Birthday sentiment
- Markers to color
- Stamping block
- Stamp pad - any color of your choice
- Embellishments (optional)
Step 1:
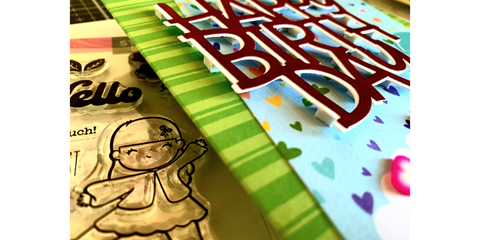
I used this huge Happy Birthday die from Mama Elephant (you can use whatever you like here), and die cut it two times, one in white cardstock and the other in red cardstock. I glued them together so that the white is like a shadow peeping through the red. The kit also comes with foam squares that I adhered at the back.
Step 2:
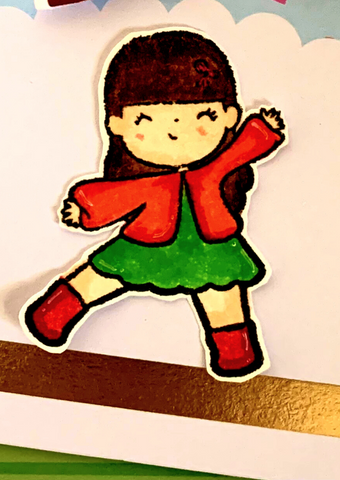
Using a stamping block, the clear stamp of the girl and black ink, I stamped the image on a watercolor paper (you can use any paper here) and colored her in with my Arteza brush pens. Then I fussy cut the outline of the image.
Step 3:
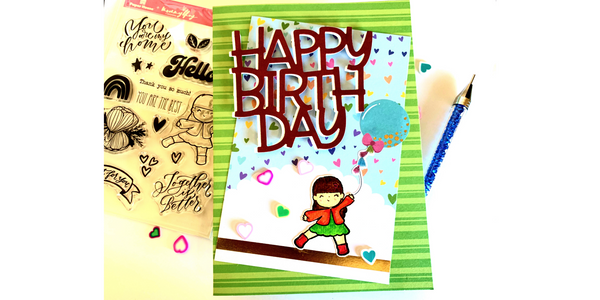
It’s assembly time. I used this folded green stripes cardstock as the note card and the blue heart background for this card. I glued all the elements as seen in the image. I also added the balloon sticker from the card kit. I also added these Trinity stamps Unconversationals clay hearts as embellishment. You can skip this step if you wish. And the card is ready!
Products used to make birthday card:
We would like to know what you think of the cards in the comments below. Thanks for being here. You are invited to follow me on Facebook and Instagram.


